Faded trim, dull dashboards, and tired-looking leather can make an otherwise clean vehicle look older than it is. A dedicated restorer helps deepen color, improve sheen, and add a protective layer so interior and exterior surfaces look cleaner and stay easier to maintain. When the goal is a “back-to-black” look (with controllable gloss), the right prep and a thin, even application make the difference between a crisp refresh and a streaky finish.
A plastic and leather restorer is designed to visually revive and protect surfaces that have lost their uniform color and finish. It doesn’t replace broken-down material, but it can dramatically improve the way trim and seating surfaces present day to day.
| Surface | Where it’s found | Typical improvement | Notes before use |
|---|---|---|---|
| Exterior plastic trim | Bumpers, mirror housings, cowl panels | Darker, more uniform color; reduced gray haze | Clean thoroughly to remove wax residue and road film |
| Interior plastic/vinyl | Dash, door panels, console | More even sheen; reduced dull patches | Avoid overly glossy application on areas that reflect into the windshield |
| Leather seating surfaces | Seats, armrests | Richer appearance; reduced dry look | Test on a hidden spot; do not use on suede/nubuck |
| Rubber seals | Door and trunk seals | Cleaner look and mild conditioning | Wipe excess to prevent residue transfer |
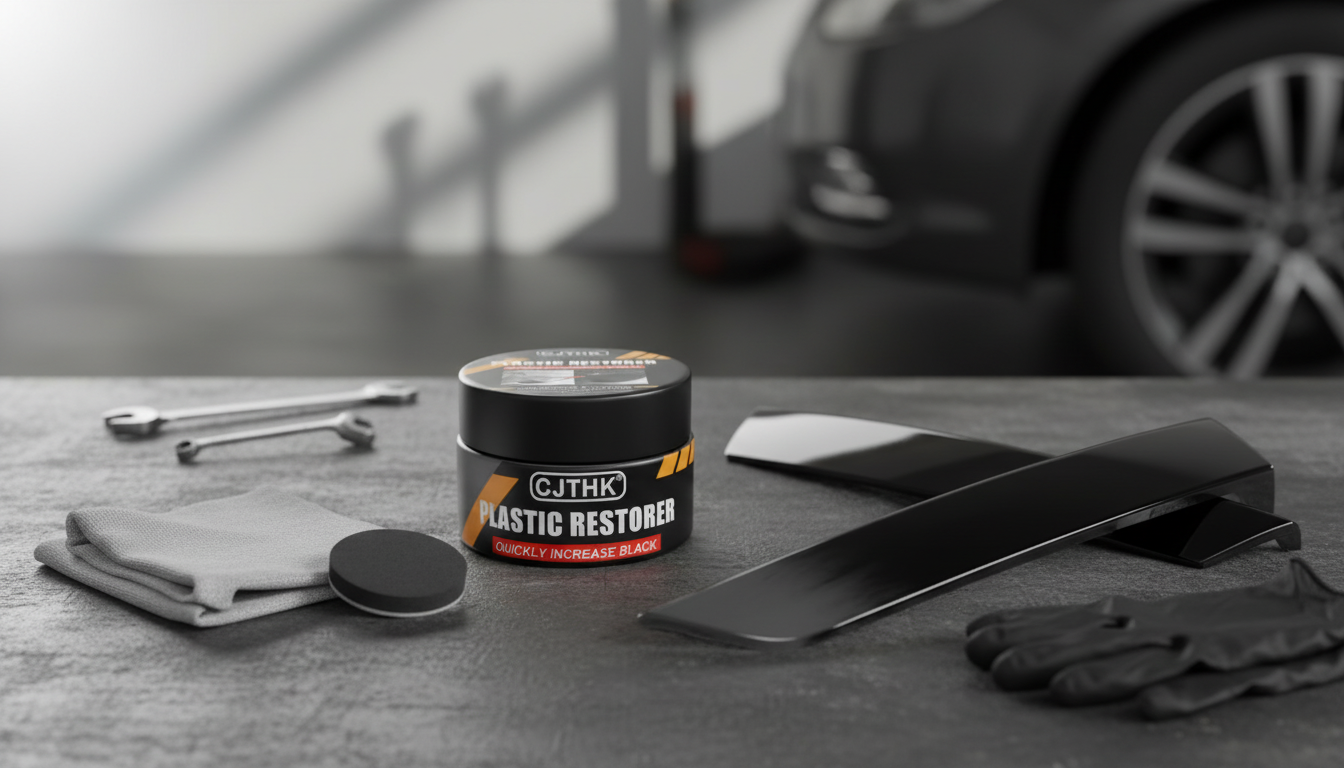
If you want a darker, refreshed look that ties exterior trim and interior panels together, Car Plastic & Leather Restorer – Back to Black Gloss Coating & Polish is built for exactly that kind of quick, high-impact improvement. It’s especially useful as a finishing step after cleaning, when surfaces look “clean but still tired” and need a richer, more even tone.
| Detail | Value |
|---|---|
| Product | Car Plastic & Leather Restorer – Back to Black Gloss Coating & Polish |
| Price | $3.67 USD |
| Availability | In stock |
| Best for | Restoring dull plastics and refreshing leather appearance |
For anyone who prefers a faster, more structured cleaning rhythm before applying restorers, the digital guide Clean Faster, Stay Calm – A Stress-Free Speed Cleaning Guide for Busy Homes can help streamline the “prep work” mindset—because restorers look best when the surface is truly clean and dry before product touches it.
A smooth finish comes from surface prep plus restraint. Most streaks happen when the product goes on too heavy, or when old wax, silicone, or grime prevents even leveling.
| Problem | Likely cause | Fast fix |
|---|---|---|
| Streaks or blotches | Too much product or uneven spreading | Buff with a clean microfiber; reapply a thinner coat if needed |
| Too glossy on the dash | Over-application in a high-reflection area | Buff down with a dry microfiber; apply less next time |
| Dust sticking | Excess product left on the surface | Wipe and buff again; keep coats thinner |
| Patchy trim | Surface contamination (wax, oils) or oxidation | Deep-clean first; repeat with thin, even passes |
Restorers are most satisfying when the problem is visual fading or mild dryness. They’re less effective when the material itself has failed.
Also keep traction and safety in mind: avoid getting any dressing or restorer on surfaces where grip matters (like pedal faces or tire tread). NHTSA notes the importance of maintaining tire safety and traction as part of vehicle upkeep, which is a good reminder to keep “shine products” away from contact surfaces (NHTSA Vehicle Safety—Tires).
If ingredient transparency and safer chemistry matter in the products you use around your home and vehicle, the EPA’s Safer Choice program outlines a recognized ingredient safety framework (U.S. EPA Safer Choice Standard).
The best option depends on whether you’re restoring exterior trim or interior plastics, the finish you want (natural satin vs. gloss), and how durable you need it to be. Look for a restorer that levels evenly, buffs clean without smearing, and offers UV resistance; testing a small hidden spot first helps confirm compatibility and the final sheen.


Leave a comment