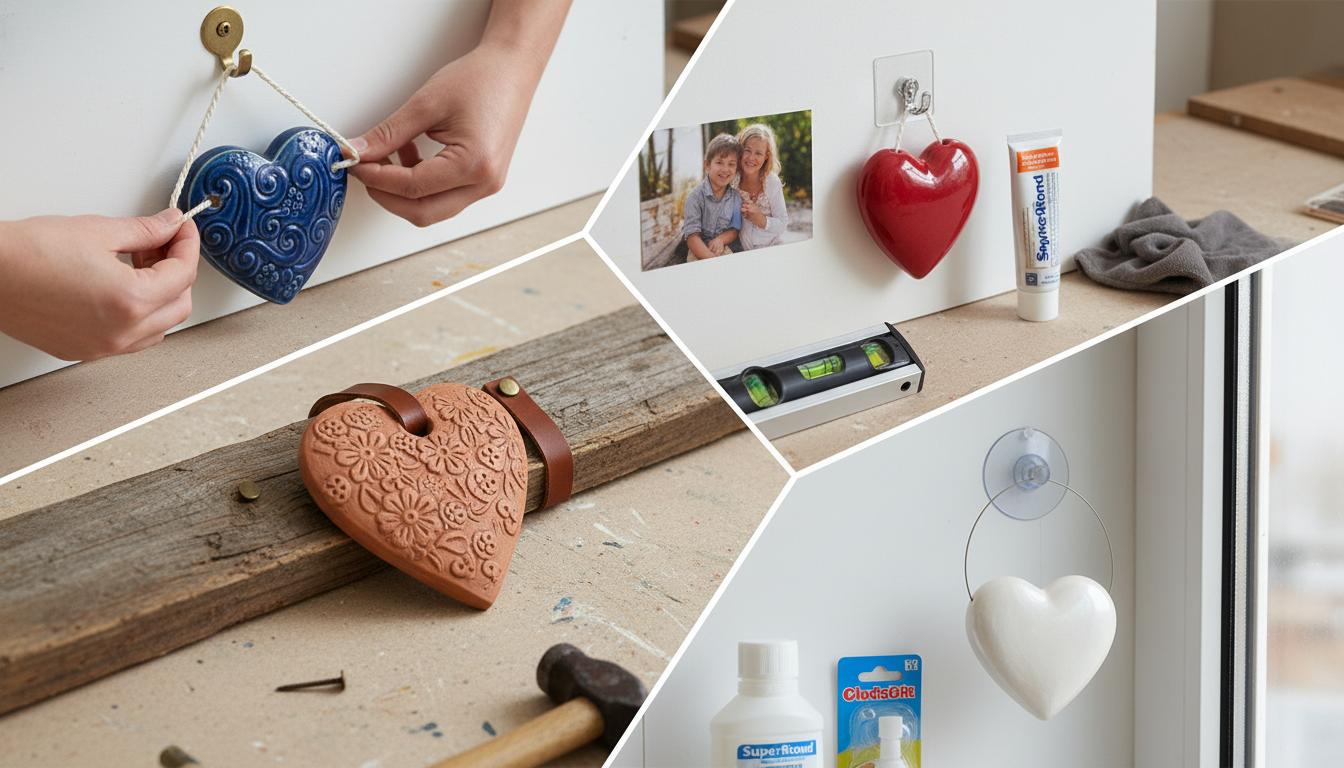
Hanging a ceramic heart is easiest when you match the hanging method to its weight and how it’s finished on the back. Some ceramic hearts have a built-in hole, loop, or hanger; others are smooth and need an adhesive solution. Before you start, decide whether you want a temporary display (seasonal decor) or a long-term mount (everyday wall art).
Turn the ceramic heart over and look for a hole near the top, a small notch, or a wire loop embedded in the clay. If it has one, thread ribbon, twine, or picture wire through the opening, tie a secure knot, and hang it on a nail or wall hook. For heavier pieces, choose a proper picture hook rated for the weight rather than a small pin.
If the back is flat and glazed, an adhesive picture hanger can work well. Clean the back of the ceramic heart with rubbing alcohol and let it dry completely. Press the hanger firmly in place and allow the adhesive to cure for the time listed on the package before hanging. This option is best for lighter ceramic hearts and for walls where you’d like to minimize holes.
For a larger, bowl-like, or slightly rounded ceramic heart, a spring-style plate hanger can provide a stable grip without adhesive. Choose one sized for the width of the piece so the prongs sit securely and don’t slip. Add small clear bumpers to the lower back edge if you want to protect the wall and keep the piece level.
Ceramic can scratch paint and shift over time. Stick small felt pads or silicone bumpers to the lower back corners, then adjust the knot or hook until the heart hangs evenly. If it’s in a high-traffic area, place it where it won’t be bumped.
For more inspiration on styling and enjoying heart-shaped ceramics, visit this heart-shaped ceramic guide.
Add two small felt pads or clear silicone bumpers near the bottom back edge to create friction and spacing, then make sure your hook is centered so the weight is balanced.


Leave a comment